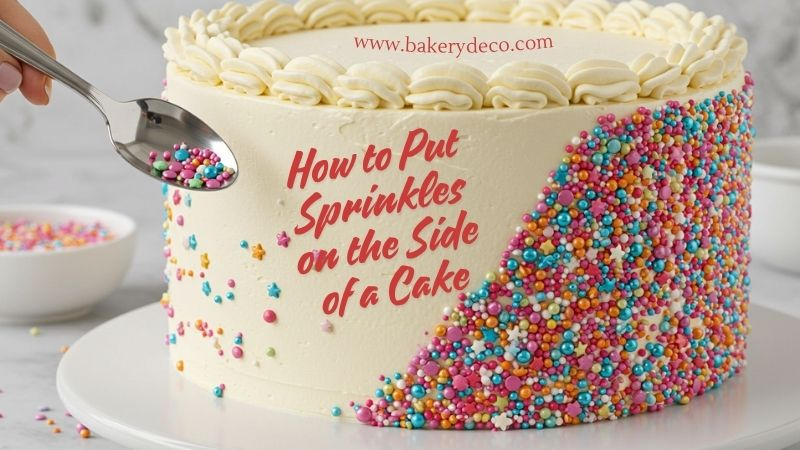
Added sprinkles to a cake make it festive and joyful. It's easy to add sprinkles to the top of a cake, but incorporating them into the sides can be more challenging. This article will show you the most effective ways to get those sprinkles just so on the sides of a birthday cake, cupcakes, or any other delicacy. It is for a special occasion.
Why add sprinkles to the side of a cake?
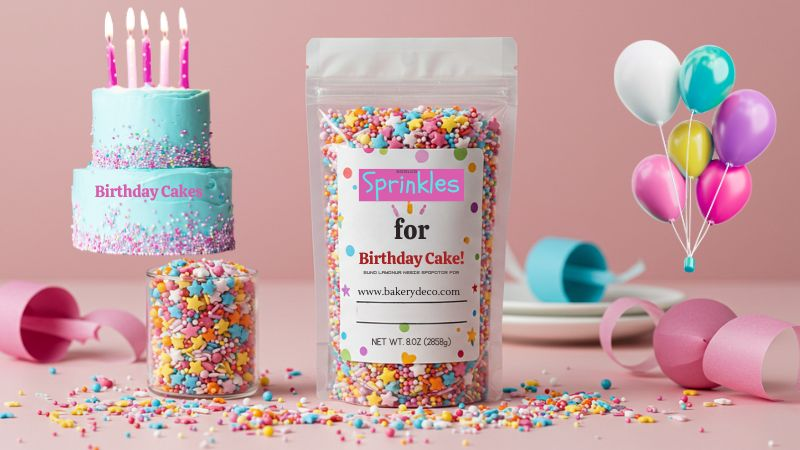
Added sprinkles to a cake make it look more professional and festive. Most people only put sprinkles on top, but putting them on the sides makes the whole thing look better and more interesting. If you want to elevate your baking skills, learn how to use sprinkles for cake, sprinkles for cupcakes, or sprinkles for birthday cake.
Materials you’ll need
Before you start, make sure you have these things:
• A cake with frosting (chilled works best).
• Your choice of sprinkles (jimmies, nonpareils, sanding sugar, etc.).
• A small bowl or plate with sprinkles.
• A cake turntable (not required, but handy).
• A bench scraper or an offset spatula.
• Parchment paper or a baking sheet (for easy cleanup).
How to put sprinkles on the side of a cake (like a pro!)
Added sprinkles to the side of a cake isn't just a fun thing to do; it's also a trendy method to make your desserts stand out on social media, at parties, and in bakeries. Sprinkles can be used in various ways, from decorating drip cakes to creating simple designs. It's how you get the look right:
1. Chill your sprinkles for cake first – the pro tip you can’t skip
A cool cake helps the frosting harden, making it easier to press sprinkles into the sides without smearing them. Put your frosted cake in the fridge for 15 to 30 minutes before adding any sprinkles. It helps harden the frosting, making it easier to add sprinkles without sliding or smudging. Buttercream tastes better when it's cold. If you're working with ganache or whipped cream, a slight chill (not freezing) works best.
For the cleanest results, use a crumb coat first, refrigerate, and then add your final coating before sprinkles.
2. Set Up a Cleanworkplace
Place the cake on a turntable that rotates, allowing you to apply frosting easily and smoothly. Place parchment paper or a silicone mat underneath to catch any sprinkles that escape. You can reuse them to reduce waste.
Warning: For a trendy, glam look, try adding metallic confetti or edible glitter sprinkles
3. Hand-Press Method – Best for Precision & Ombre Effects
Put your sprinkle mix in a small basin. Take small amounts in your palm and gently rub them against the side of the cake. Use your other hand to tilt the cake so that the frosting goes evenly slowly.
The idea for styling: Use different sprinkle mixes in separate parts to make ombre or gradient effects. These are pretty popular for birthday cakes!

4. Roll Method – For Bold, All-Over Coverage
Place the sprinkles for cupcake on a platter and gently roll it against the sides to press the sprinkles onto it. Slowly turn the cake to ensure it receives an even coating.
Place a baking sheet with a rim on a flat surface and sprinkle evenly. Carefully pick up the cold cake and roll it down the sides, pressing down gently. This method works well for more miniature cakes or those that aren't too fragile. New and interesting twist: For a more layered, boutique-style look, try mixing several types of sprinkles, like jimmies, pearls, and nonpareils..
5. Spatula Press Method – For a Neat, Professional Finish
For a Clean, Professional Look
Put the sprinkles on a big, flat plate or platter. With a spatula or bench scraper at a slight angle, push the sprinkles up against the sides of the cake. Tip for experts: Use this strategy for sprinkles for cake with sharp edges or square tiers when a neat line is critical.
6. Fill in Gaps for a Flawless Look
Look for any bald spots on your cake. If the frosting has set too much, use your fingers to press the sprinkles into the gaps. You can also lightly spray the area with edible glue.
Use shaped sprinkles (such as stars, hearts, and letters) in select places to make focus points or spell out a message.
Bonus Trend: Sprinkle Art + Branding
You can use stencils or custom templates to make designs using sprinkles, such as initials, logos, or abstract art. Bakeries that make high-end or branded cakes like these.
Adding sprinkles to the side of your cake is one of the easiest ways to give it a trendy, bright finish, whether you're trying for a fun sprinkles for birthday cake or an Luxurious party cake. Mix techniques, textures, and colors to fit your style—and don't forget to capture that perfect photo before the first slice!
If some places look empty, use your hands to add more sprinkles until the sides are entirely covered.
Top tips for perfectly applying sprinkles for cupcake sides
Use the right frosting base
Use sticky frostings, like buttercream or cream cheese. They work well as a glue for sprinkles. Avoid using dry or crusty frostings unless you're applying edible glue.
ü Break it up into smaller parts
To keep control and accuracy, work on one side of the cake at a time. It also stops sprinkles from falling unevenly or frosting from being too soft.
ü Use Different Sprinkler Types
Different sprinkles have different effects:
· Jimmies are fantastic for covering things up and creating neat patterns.
· Nonparails give a lovely, speckled, old-fashioned texture.
· Sugar pearls and confetti offer depth and class.
· Shaped sprinkle quotes (stars, heart requests) are the Mesa for unique messages or places of interest.
ü Cill before and after
Put the cake in the fridge for 15 to 30 minutes before adding the sprinkles to firm the frosting. Then, put it in the refrigerator again after decorating to keep everything in place.
ü Try the "Press & Roll" combo
Press the sprinkles down lightly with your hands or a spatula. Then, roll the cake against a tray of sprinkles to make sure they are evenly spread out. It works best for round sprinkles for cupcake.
ü Get Creative with Colors & Placement
For an extra touch of style, try ombre layering, color blocking, or even a sprinkle of color on the bottom border. Trends like gold flakes or metallic mixes give things a fancy look..
Creative Ways to Decorate Cakes with Sprinkles
Sprinkles aren't just for funfetti; they can also be used to make your sprinkles for cake elegant and eye-catching. Here are some creative and creative ways to utilize sprinkles for birthday cake, weddings, or Instagram-worthy moments:
The ombre effect
To create an ombre effect that fades, mix in sprinkles of different colors from the bottom to the top (or vice versa). Start with dense, dark sprinkles at the base and progress to lighter, sparser ones toward the top.
Smart hack: For personalized color fading, use matching sprinkle blends or tint white sprinkles with edible dust.
Striped Design
For a bold, modern look, use sprinkles in horizontal or vertical stripes. Use stencils or masking tape to mark your lines, and then sprinkle on colors or textures different from each other.
Change in Style: For a stylish look, alternate rows of glittered or metallic sprinkles.
Accent Borders
Place a thick band of sprinkles around the top, bottom, or both edges. This subtle touch frames the cake and highlights other embellishments, such as a cake topper or piped flowers.
Suitable for: Fancy gatherings or when you want sprinkles to add to your sprinkles for cake design instead of detracting from it.
Sprinkle Explosion (Drip Base + Sprinkles):
Put sprinkles at the bottom of a drip cake where the ganache and frosting meet. It creates a colorful explosion effect that balances the flowing drip with texture.
Look in Style: Try neon or rainbow sprinkles against black or white buttercream for a great contrast.
Sprinkle Confetti Splash
Flick or scatter sprinkles onto the cake at an angle to create a random confetti burst effect. It is a fun, creative touch that works well on simple cakes.
Extra Flair: For a festive flair, add edible glitter or gold leaf to the sprinkling.
Patterned or Shaped Designs
Use cookie cutters or templates to print out as a guide. Fill the form with sprinkles for hearts, numbers, stars, or even names made entirely of sprinkles.
An idea for customization: Great for cakes with logos, birthdays, or anniversaries.
Sprinkle Toppers or Centerpieces
You can make stars, spheres, or number toppers by mixing sprinkles with edible glue or melted chocolate. Let them harden, then put them on top of your cake.
Hack for DIY: Pour sprinkles into silicone molds to make embellishments you can use again and again!
Sprinkle dotted silhouettes
You can use a stencil to put sprinkles on the side or top of the cake in the shape of a silhouette, such as balloons, crowns, or flowers. To get a clearer picture, tap on the extra.
Best paired with nonpareils or fine sprinkles, such as sanded sugar, for crisp edges.
Sprinkled Textures.
To make your sprinkles for cake stand out, use jimmies, nonpareils, confetti, and pearls in various sizes and shapes. This method gives things depth and a handmade, artistic look.
Layer it: Mix matte and glossy sprinkles to provide dimension.
FAQs: How to Put Sprinkles on the Side of a Cake
Can I use melted chocolate to help sprinkles stick?
Yes! For added hold, lightly apply melted chocolate or piping gel before adding sprinkles.
How do I prevent sprinkles from falling off?
Putting the cake in the fridge before and after the sprinkles helps it stick.
What’s the best type of sprinkle for cake sides?
Jimmies and other long sprinkles stick better than small nonpareils, but both work if you know how to use them.
Final Thoughts
You may now try out different ways to decorate sprinkles for birthday cake, holidays, or any other special event. These tips can help you get a professional finish every time. It is whether you're using sprinkles for cupcake, a sprinkles for birthday cake, or just decorating a cake.
Are you ready to give it a shot? Get your favorite sprinkles and make your next cake a work of art!


